


This article will walk you through setting up Zotero 7, the popular open-source reference management software, with cloud integration for seamless access across all your devices.
Why Choose Zotero?
Zotero stands out as a powerful, free reference management tool with these key advantages:
- Completely free and open-source
- Automatic metadata extraction from PDFs
- Browser integration for one-click paper collection
- Word integration for citations and bibliography generation
- Cloud synchronization capabilities
- Extensive plugin ecosystem
The main challenge is the initial setup complexity, which this guide will solve step by step.
✨ 2025-07-10 UPDATE
I’ve expanded and completely revised all previous Zotero posts—adding the latest AI-integration tips—and consolidated everything into one paid PDF. It’s packed with strategies to master Zotero, so check it out if you’d like a deeper dive!
Overview of Our Setup Strategy
We'll configure Zotero to:
- Automatically import papers and extract metadata
- Store PDF files in your preferred cloud storage (Google Drive, OneDrive, or Dropbox)
- Sync reference data across devices
- Enable tablet/mobile access to your papers
Here's the workflow we'll create:
PC → Zotero → Zotmoov Plugin → Cloud Storage → Access from any device
Chapter 1: Installation and Initial Setup
Download and Install Zotero 7
- Visit the official website: https://www.zotero.org
- Click "Download" on the homepage
- Choose your platform:
- Windows: "Zotero 7 for Windows"
- Mac/Linux: Click "Other platforms" for additional options
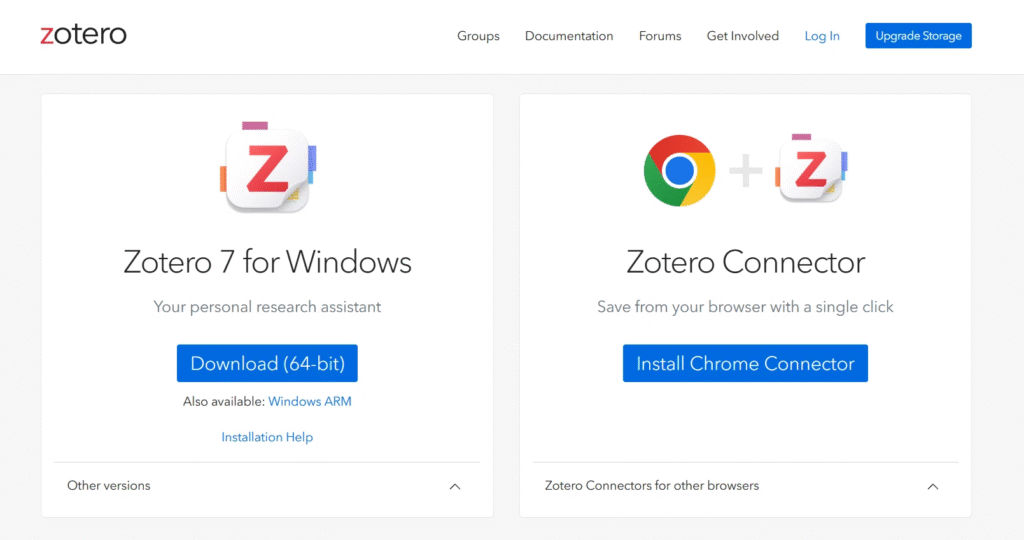
Install Zotero Connector (Essential!)
On the same download page, install the Zotero Connector browser extension:
- For Chrome: Click the link and select "Add to Chrome"
- For other browsers: Choose from "Zotero connectors for other browsers"
This extension allows one-click importing of papers from academic websites, and even book information from Amazon.
Installation Process
Run the downloaded installer and choose Standard installation unless you have specific preferences. This installs all necessary components.
Chapter 2: Essential Zotero Configuration
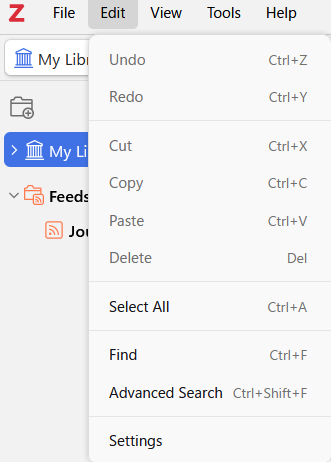
Launch Zotero and navigate to Edit → Settings to optimize your settings.
General Settings
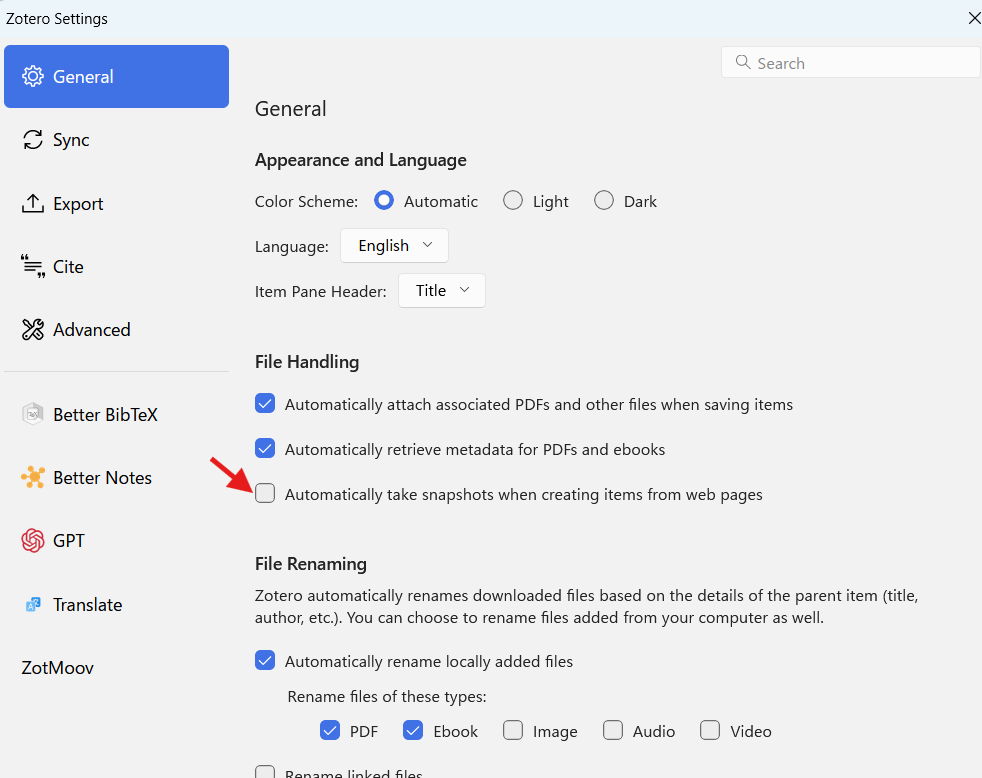
File Handling section:
- ✅ Uncheck "Automatically take snapshots when creating items from web pages"
- This prevents unnecessary HTML files when importing papers
- You'll primarily work with PDF files
Sync Settings
Configure two types of synchronization:
1. Data Sync (Metadata - Free & Unlimited)
- Create a free Zotero account at https://www.zotero.org/user/register/
- Enter your credentials in the "Data Syncing" section
- This syncs your reference metadata, notes, and tags across devices
2. File Sync (PDFs - We'll use external cloud)
- ✅ Uncheck "Sync attachment files in My Library"
- Zotero's storage is limited (300MB free) and expensive for larger collections
- We'll use Google Drive/OneDrive/Dropbox instead for much better value
Export Settings
- Item Format: Choose your preferred citation style (APA, MLA, Chicago, etc.)
- Note Format: Select Markdown (more versatile than HTML)
Chapter 3: Cloud Storage Integration
Choose Your Cloud Provider
Compare the options:
| Service | Free Storage | Pros |
|---|---|---|
| Google Drive | 15GB | Largest free capacity, excellent stability |
| OneDrive | 5GB | Best Windows integration, 1TB with Microsoft 365 |
| Dropbox | 2GB | Superior sync reliability, lightweight |
Recommendation: Google Drive for new users due to generous free storage.
Google Drive Setup
- Download Google Drive Desktop from https://www.google.com/drive/download/
- Choose sync method:
- Streaming: Access files on-demand (recommended)
- Mirroring: Full local sync
- Create a dedicated folder for Zotero papers:
- Open Google Drive → My Drive
- Right-click → New → Folder
- Name it "ZoteroLibrary" or similar
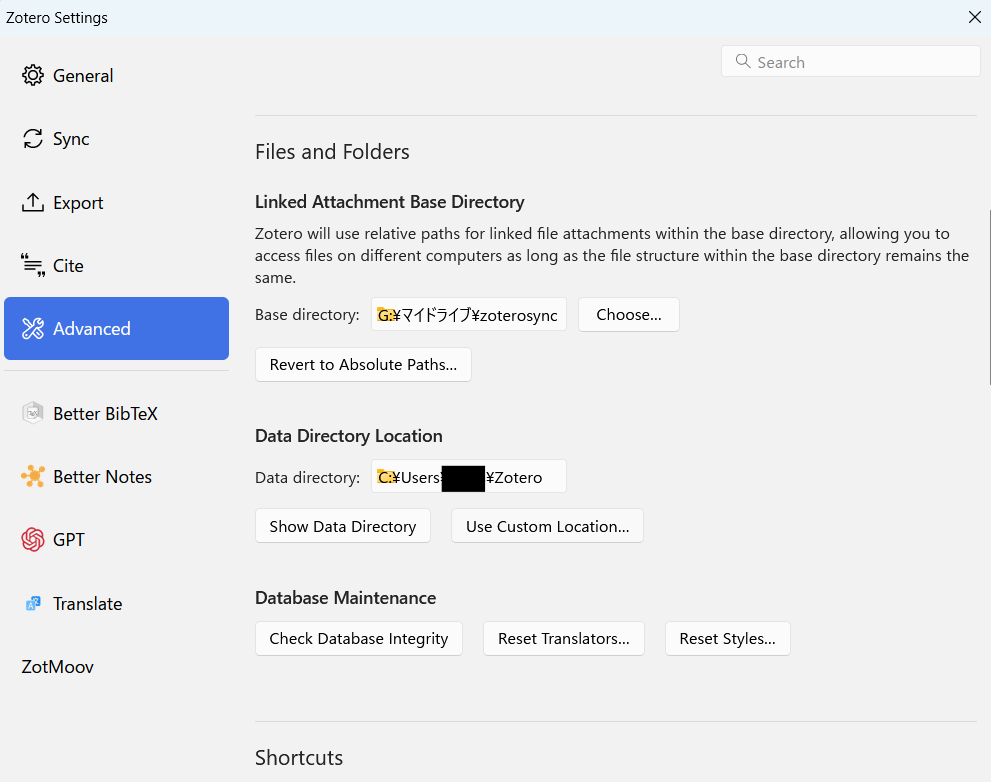
Configure Zotero's Linked Attachment Directory
In Zotero's Preferences:
- Go to Advanced tab
- Set "Linked Attachment Base Directory" to your cloud folder path
- ⚠️ Important: Never change "Data Directory Location" to a cloud folder - this can corrupt your database
Chapter 4: Installing and Configuring Zotmoov
Since Zotero 7 no longer supports ZotFile, we'll use Zotmoov for automatic file management.
Download and Install Zotmoov
- Visit: https://github.com/wileyyugioh/zotmoov
- Download: Click "Download the latest release here" → download the .xpi file
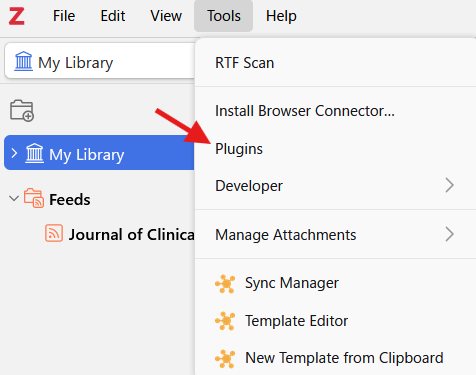
- Install in Zotero:
- Tools → Plugins
- Gear icon → "Install Plugin From File"
- Select the downloaded .xpi file
- Restart Zotero
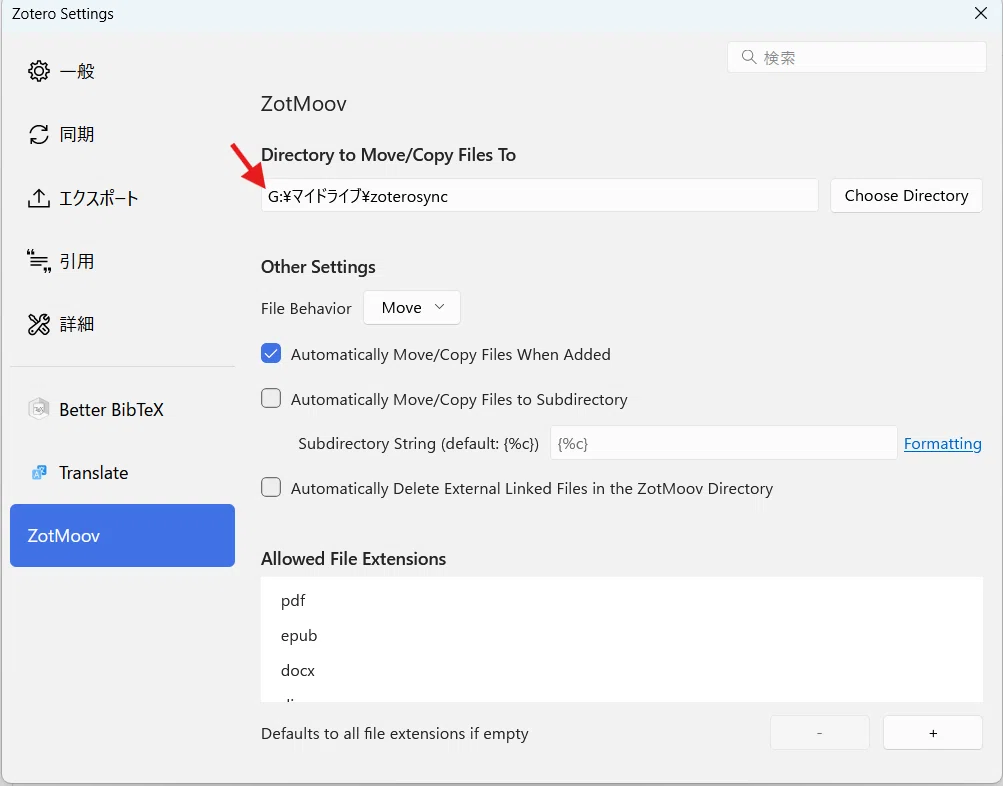
Configure Zotmoov Settings
Navigate to Edit → Preferences → Zotmoov tab:
Basic Configuration:
- Destination folder: Enter your cloud folder path
- File behavior: Choose "Move" (saves local space) or "Copy" (keeps local backup)
- ✅ Check "Automatically Move/Copy Files when Added"
Optional - Subdirectory Organization:
- Enable if you want papers sorted into folders by author, year, etc.
- Use wildcards like
{%a}(author) or{%y}(year) - Reference: Zotmoov wildcard documentation
Chapter 5: Using Your Setup
Adding Papers to Zotero
Method 1: Browser Extension
- Visit any academic website (PubMed, Google Scholar, journal sites)
- Click the Zotero Connector icon in your browser
- Paper and PDF automatically imported and processed
Method 2: Drag and Drop
- Drag PDF files directly into Zotero
- Metadata automatically extracted
- File automatically moved to cloud storage via Zotmoov
Manual File Management
If automatic processing fails, right-click any item in Zotero:
- "Move Selected to Directory": Send to cloud storage
- "Move Selected from Directory": Bring back to local storage
Multi-Device Access
On PC: Use Zotero application with full functionality
On Tablet/Mobile:
- Access cloud storage directly through your provider's app
- Use any PDF reader app for annotations
- Popular options: Documents by Readdle (iOS), Adobe Acrobat Reader
Sync Flow: Annotations made on mobile → Cloud sync → Available everywhere
Chapter 6: Advanced Tips and Workflow
Citation Workflow
- In Word: Install Zotero Word plugin during initial setup
- Insert citations: Use Zotero toolbar in Word
- Generate bibliography: Automatically formatted in your chosen style
- Update references: Changes in Zotero automatically update in documents
Organization Best Practices
- Use Collections: Create topic-based folders in Zotero
- Add Tags: Use consistent tagging for easy searching
- Write Notes: Take advantage of Zotero's note-taking features
- Regular Maintenance: Periodically check for missing PDFs or metadata
Troubleshooting Common Issues
PDFs not moving to cloud:
- Check Zotmoov settings and folder permissions
- Manually move using right-click menu
Metadata not extracted:
- Try renaming the PDF to include author/title information
- Use "Retrieve Metadata for PDF" from right-click menu
Sync issues:
- Ensure you're signed into your Zotero account
- Check internet connection
- Restart Zotero if sync seems stuck
Conclusion
You now have a powerful, free reference management system that:
- ✅ Automatically collects and organizes papers
- ✅ Stores files safely in the cloud
- ✅ Provides access from any device
- ✅ Integrates seamlessly with your writing workflow
This setup will serve you well throughout your research journey, whether you're a student, academic, or professional researcher. The initial time investment in configuration pays dividends in long-term productivity and organization.

コメント