


Would you like to search, organize, compare, or summarize the papers stored in your Zotero library using a large language model (LLM)?
Today, tools like Google NotebookLM make it easy to work with multiple PDFs using AI. However, they often fall short when it comes to searching through a large number of papers stored in Zotero all at once.
In this article, we’ll walk you through how to integrate Claude, one of the leading LLMs, with Zotero using the Model Context Protocol (MCP). We’ll cover everything from setup to usage, so feel free to follow along.
🛠 Bonus: Complete Zotero Utilization Guide
This article is just one part of a comprehensive Zotero guide available on Gumroad, which includes the Claude integration and more. The guide will be updated over time—be sure to check it out:
If you find it a bit challenging to integrate Claude with an MCP server, I highly recommend trying Google NotebookLM together with Zotero. You can read more in the article below.

Setup
What You’ll Need
- Claude Desktop App (Pro plan is recommended)
- Python 3.10 or later OR Node.js
Don’t worry if you don’t have these tools yet—we’ll start from the download and installation process. If you already have them, feel free to skip ahead.
Step 1: Install Claude Desktop
Start by downloading the desktop version of Claude from the official site:
Note: The browser version does not support MCP integration—only the desktop app does. After launching, you’ll need to create and log into your Anthropic account.
The free plan technically supports MCP, but due to strict usage limits, it’s often impractical. You might want to test it with the free version first before upgrading.
Step 2: Install Python
You’ll use either Python or Node.js to launch the MCP server. Python tends to be more versatile for researchers, so we recommend Python if you’re unsure.
Download Python from the official site:
Just install the default version shown. For detailed steps, refer to:
Using Python on Windows - Python 3 documentation
Important: During installation, check the box that says “Add Python 3.x to PATH”—this allows you to run python from the command prompt.
To verify installation:
python --versionYou should see the installed Python version. If so, you’re good to go.
Step 3: Launch the MCP Server
Now, we’ll set up the MCP server using Python.
First, install a tool called uv using Python’s built-in package manager pip:
pip install uvOnce installed, run the following command to install the Zotero MCP server:
uv tool install "git+https://github.com/54yyyu/zotero-mcp.git"This will download all the tools required for Zotero-MCP integration.
Enable Zotero’s Local API
In Zotero, go to Preferences > Advanced and check the box to enable Local API.
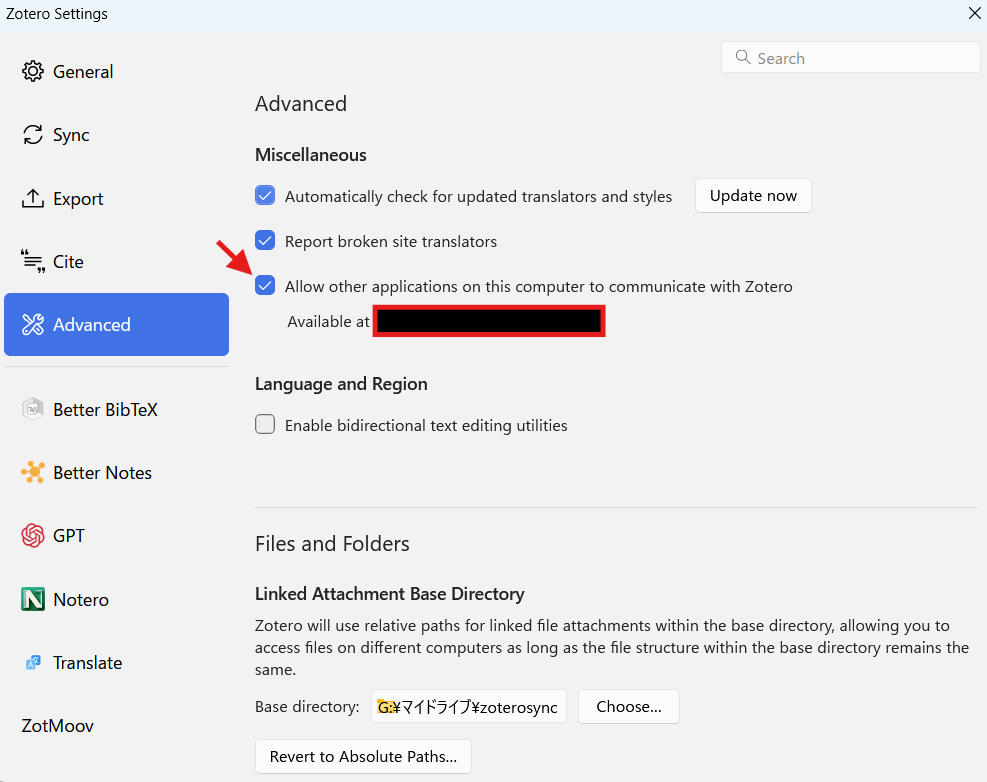
Then return to your command prompt and run:
zotero-mcp setup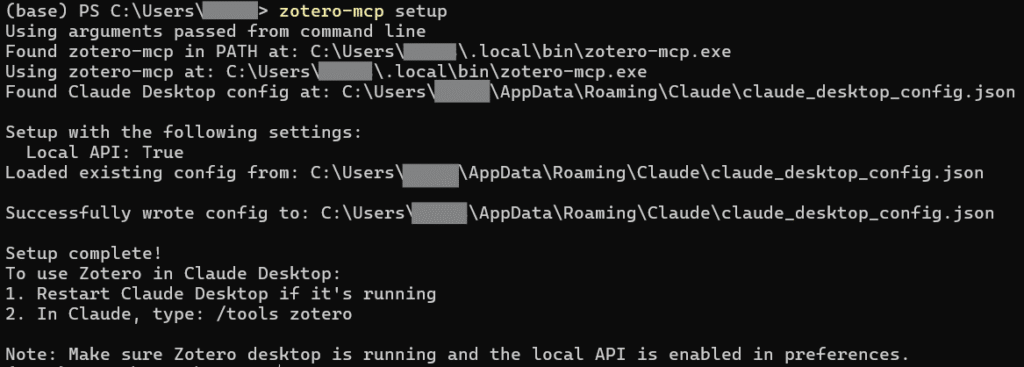
If successful, you should see something like “Local API: true,” indicating that the connection is working.
The configuration file claude_desktop_config.json will be generated automatically.
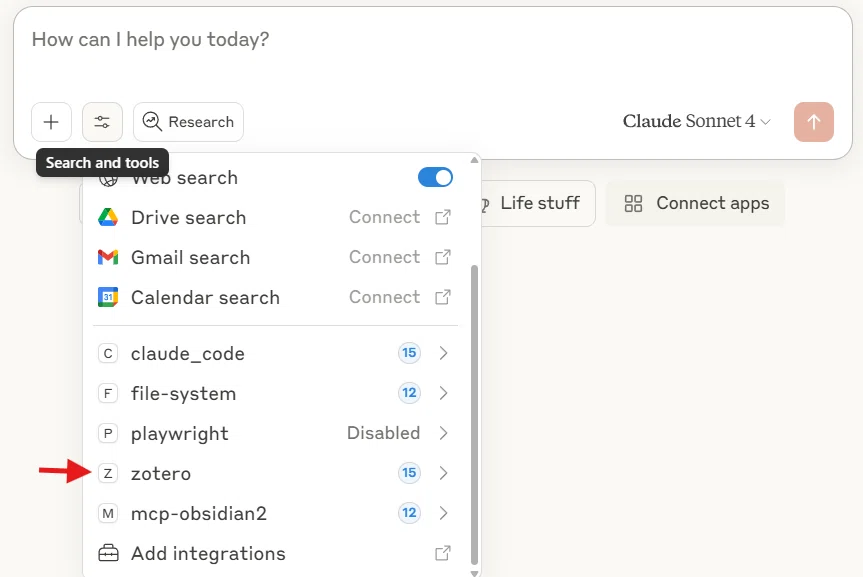
You're done! 🎉 Claude should now show “zotero” under its search & tools section. That means the setup was successful.
Basic Usage
Once everything is set up, you can simply prompt Claude with something like:
“Summarize the papers in Zotero about dementia and statins.”

Claude will automatically access your Zotero library and use commands to search, view papers, or read notes as needed. To avoid search errors, try to use precise titles, tags, or collection names.
Full-text search is supported, so you can also look for papers using specific methodologies. While true “semantic search” isn’t available, Claude often adjusts keywords intelligently to match your intent.
Example:
“Find English-language observational studies in my Zotero library that used propensity score methods. I’m not looking for explanations of the method—just studies that applied it.”

Keep in mind that if there are too many similar papers, Claude might not process them all. It's best to narrow your query when possible.
Note: The note-taking function exists but currently doesn’t work due to a known bug. You’ll need to copy-paste the information manually from Claude’s output. This issue has been reported on GitHub and may be fixed in the future.
How to Guide Claude Effectively
Observe how Claude responds to your prompts. This helps you understand what it can and can’t do.
For example, when you say:
“Find papers on propensity score methods,”
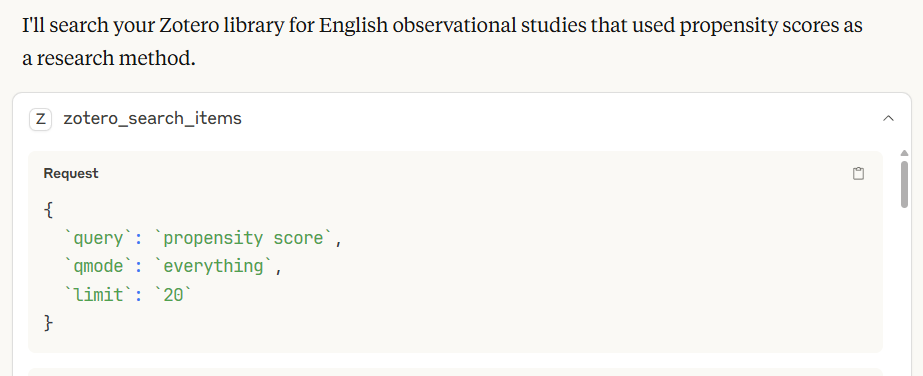
Claude sends a request like:
{ "query": "propensity score", "limit": 20 }It then tries different keywords, retrieves paper titles, reads promising ones in full, and summarizes them for you.
This means Claude doesn’t actually read every document—it samples intelligently. So, well-crafted prompts help it be more efficient.
Despite limitations, this method is quite effective for quickly scanning your library or summarizing content.
Optional: Using Node.js Instead of Python
If you prefer, you can use Node.js instead of Python to run the MCP server. Node.js is a runtime that lets you use JavaScript outside of the browser.
Installation instructions are available in this Obsidian-related article:
👉 https://lab.nounai-librarian.com/obsidian2/
Once installed, run this command:
npx -y @smithery/cli install @54yyyu/zotero-mcp --client claudeThat’s it! Your MCP server should be ready to go. But don't forget to change Zotero settings before using this MCP server.
Summary
We’ve walked through how to integrate Zotero with Claude using MCP. While you'll need to be mindful when working with large libraries, Claude often does a great job narrowing things down.
This setup is especially useful for quick literature reviews or summarizing notes. The MCP system may feel complex at first, but mastering it prepares you to adapt to future tools as well.
Give it a try—it may transform how you manage your research workflow.


コメント